When we build Drupal websites, we often have to create a custom data structure which can hold multiple values, each value having its own set of fields. For example, a phone number might have a country code, area code, the actual number, and then a type (work, home, cell). And you might have to create a field that accepts multiple phone numbers.
You might be tempted to build out these types of fields using a module like field collections or paragraphs, but if you're a Drupal developer, you can easily create custom reusable fields to accomplish the same thing. Drupal's Field API gives us a pretty straightforward way to do this in a custom module, and the result is a field that we can easily re-use across content types.
In this blog post, I'll show you how to create a custom compound field for Drupal, using burrito ingredients as an example. Creating our field will involve three main steps:
- Defining a custom field type.
- Defining a custom field widget.
- Defining a custom field formatter.
As I do for any new Drupal adventure, I started with the Drupal examples module - in this case, the field_example module. I also referred to the poutine_maker project for Drupal 7 and tried to create something similar. Reading this post should give you a basic idea as to how to do the three tasks listed above and adapt the example provided to build your own shiny new custom field!
The Challenge
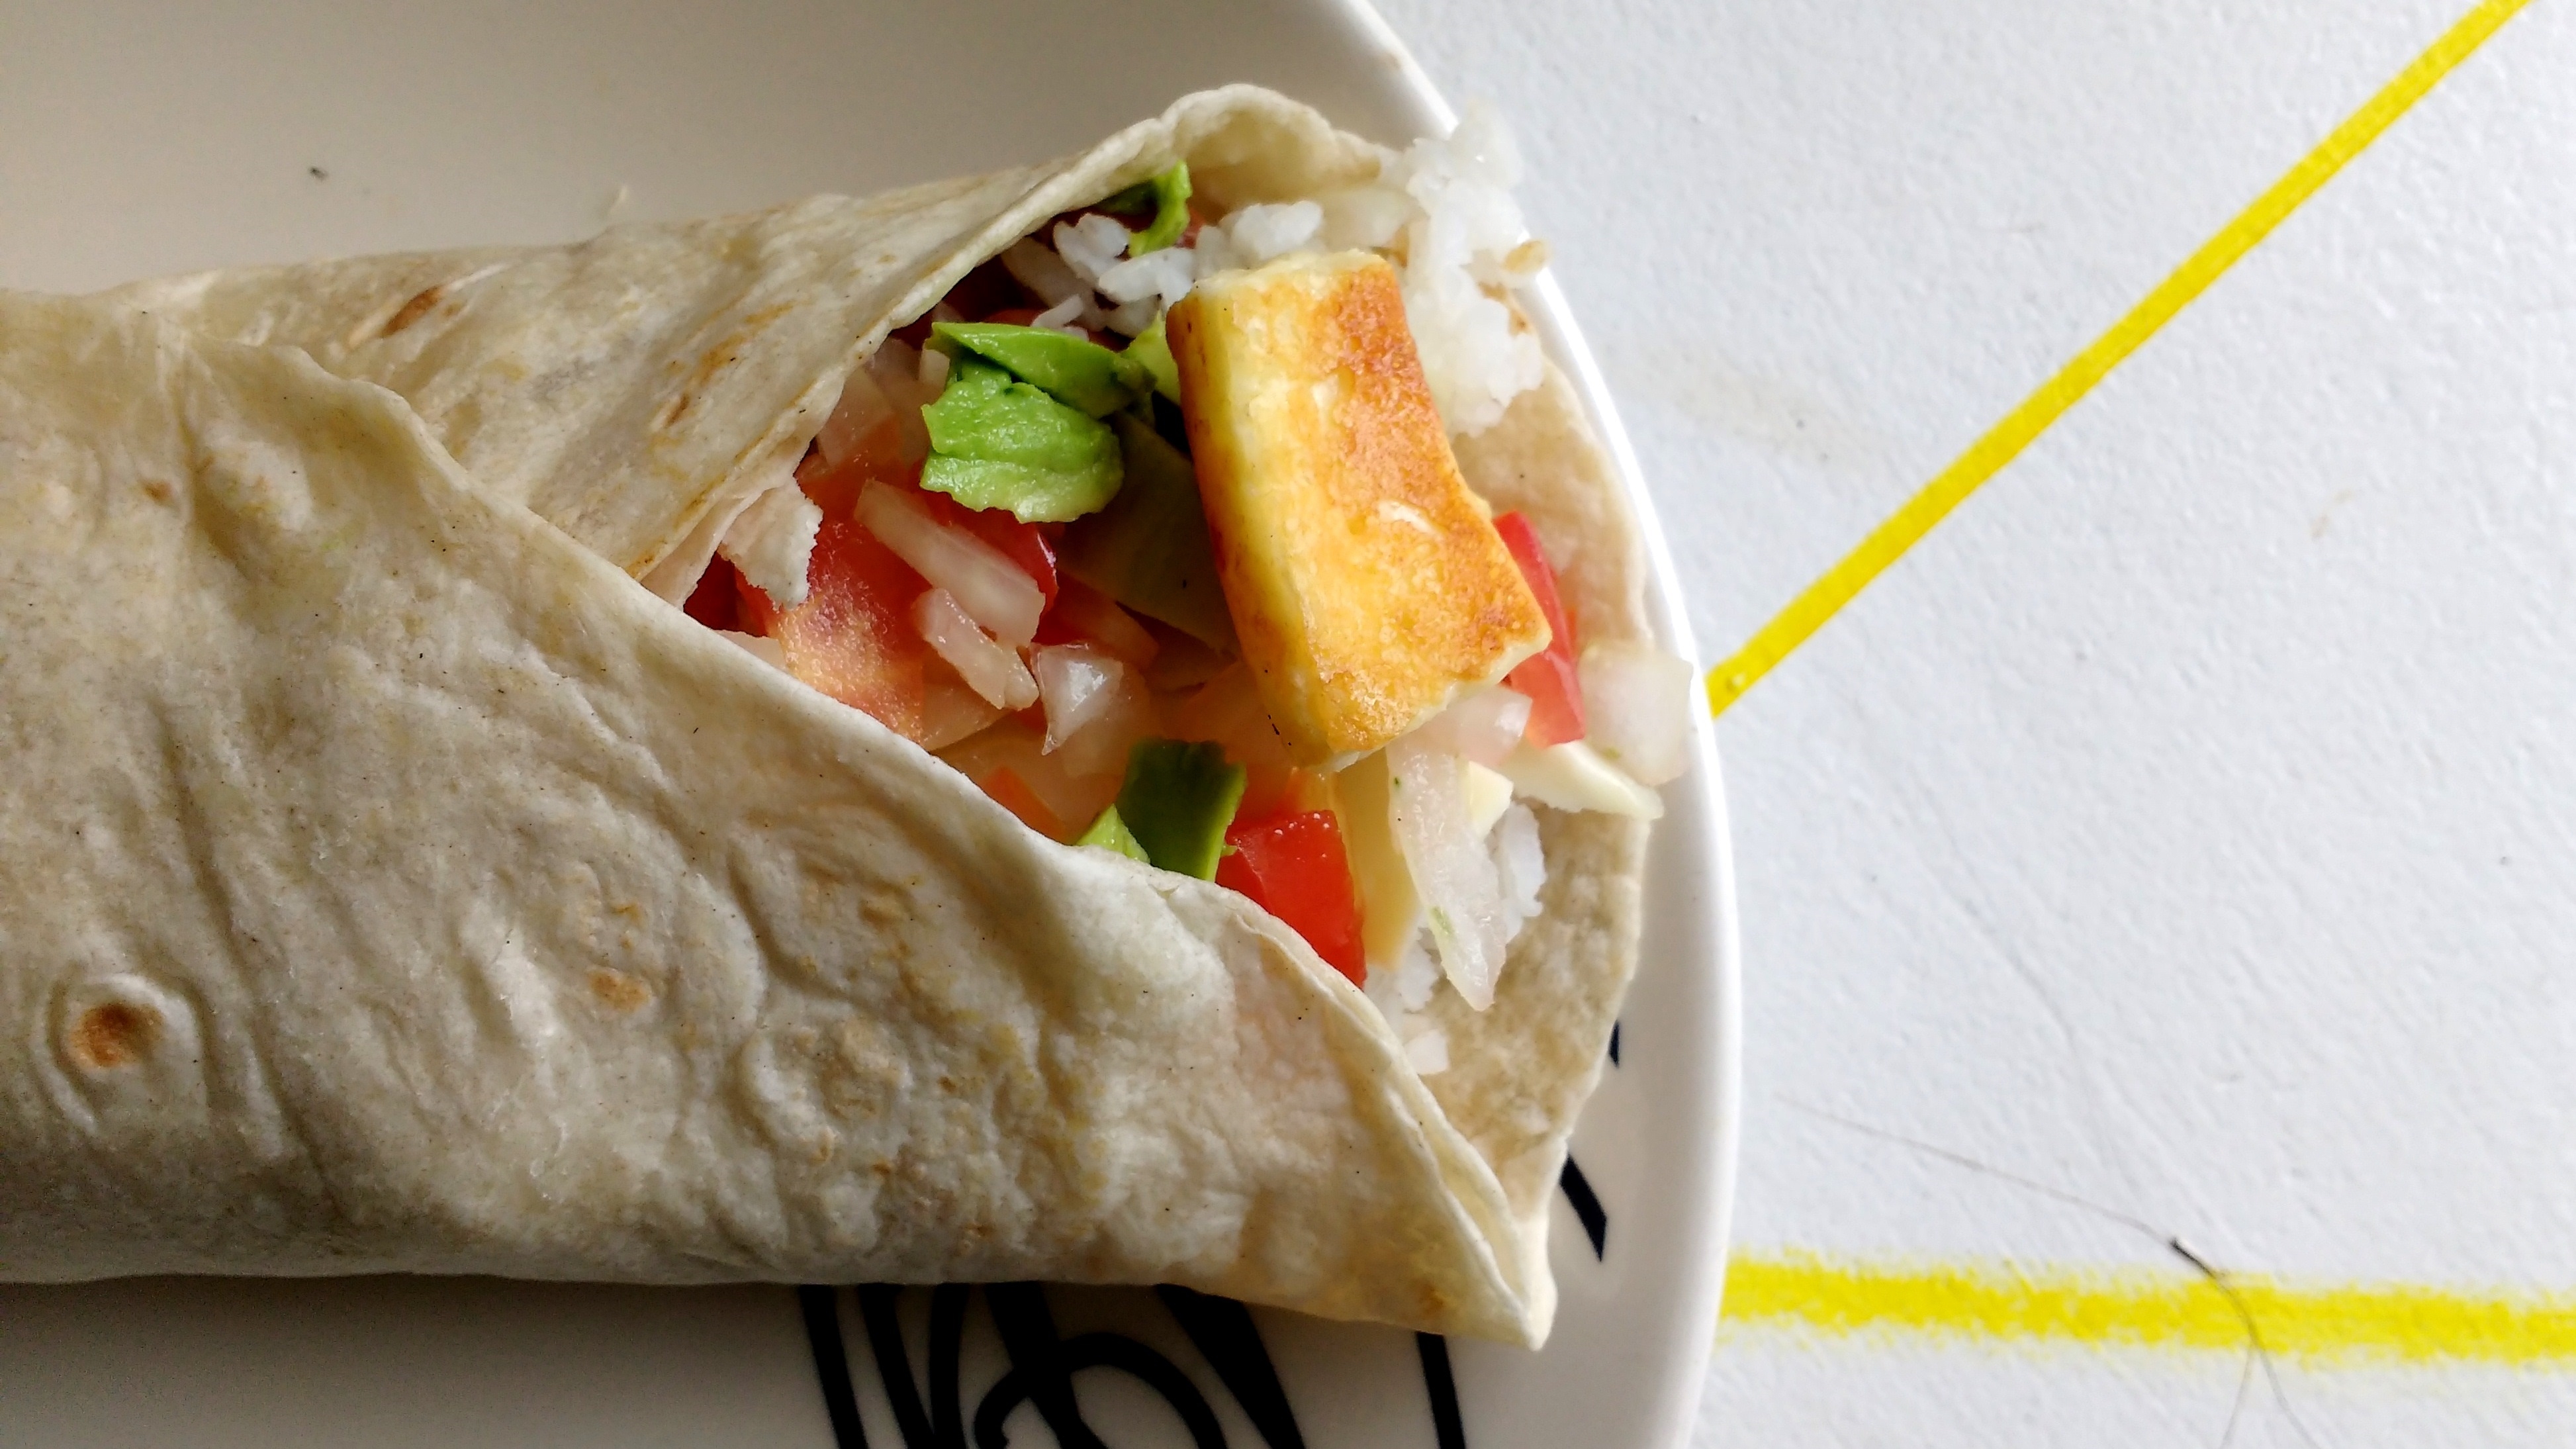
Having spent 6 months in Bogotá DC, the capital of Colombia, I came across a yummy food item - the Burrito (originally a Mexican recipe) - a big flour tortilla, filled with a variety of vegetables, meat (optional), sauces and cheese, wrapped in a foil - worth every dollar (or should I say peso) you pay for it! Makes you wanna exclaim "¡Es muy rico!"
So I thought, what if we had a site where visitors could write articles and with each article, they could include the set of ingredients they prefer in their burritos? Every user would be able to create a piece of content (node) specifying multiple burrito recipes, each recipe having:
- A string name for the burrito;
- Boolean flags for every ingredient / topping;
Thus, as per requirements, I decided to make the burrito_maker module.
Setting up the Module
There's nothing fancy about the burrito_maker module, except for the fact that it defines a custom field. It includes the following important files:
- A standard info.yml file (successor of the info file) with inc files for utility functions.
- A Field Type plugin implementation.
- A Field Widget plugin implementation.
- A Field Formatter plugin implementation.
Unlike Drupal 7, field types, field widgets and field formatters are defined and detected using Plugin definitions with annotations like @FieldType, @FieldWidget and @FieldFormatter respectively. Hence, we have no hook_field_* implementations in the .module file. Instead, there are separate files to define our plugins.
All the plugin declarations in the burrito_maker include namespace declarations and use statements at the beginning of the class files. These are used for organizing code and for autoloading classes in Drupal.
Step 1: Define field type with @FieldType annotation
The first thing to do is create a FieldType plugin implementation. This is done using a class which represents a single item of the Burrito field type. By convention, it has been named the BurritoItem. Notice the @FieldType part of the class documentation - this replaces the Drupal 7 hook_field_info() implementation.
/**
 * Contains field type "burrito_maker_burrito".
 *
 * @FieldType(
 *   id = "burrito_maker_burrito",
 *   label = @Translation("Burrito"),
 *   description = @Translation("Custom burrito field."),
 *   category = @Translation("Food"),
 *   default_widget = "burrito_default",
 *   default_formatter = "burrito_default",
 * )
 */
class BurritoItem extends FieldItemBase implements FieldItemInterface {
  public static function schema(FieldStorageDefinitionInterface $field_definition) {...}
  public static function propertyDefinitions(FieldStorageDefinitionInterface $field_definition) {...}
  public function isEmpty() {...}
}
The field type machine-name is burrito_maker_burrito. At times, it may seem tempting to name your field only burrito instead of burrito_maker_burrito. However, it is good practice to define stuff in the namespace of your own module. Here's a quick look at what we defined:
- id: The unique machine-name.
- label: The human-readable name.
- description: A brief description.
- category: The category under which the field appears in the Field UI. Example: In the Add a field page in the Field type selection widget.
- default_widget: The default input widget to use for the field type. I added this line after I created the burrito_default field widget plugin.
- default_formatter: The default output formatter to use for the field type. I added this line after I created the burrito_default field formatter plugin.
The class also contains some required methods (which previously used to be hook_field_* functions) given below:
BurritoItem::schema() - Tell Drupal how to store your values
Here, we define storage columns to be created in the database table for storing each value of the given field type. The method returns an array using the same format as hook_schema() implementations.
BurritoItem::propertyDefinitions() - Provide meta data for field properties
Here we define additional information about sub-properties of the field.
public static function propertyDefinitions(FieldStorageDefinitionInterface $field_definition) {

  module_load_include('inc', 'burrito_maker');

  $properties['name'] = DataDefinition::create('string')
    ->setLabel(t('Name'))
    ->setRequired(FALSE);

  $topping_coll = burrito_maker_get_toppings();
  foreach ($topping_coll as $topping_key => $topping_name) {
    $properties[$topping_key] = DataDefinition::create('boolean')
      ->setLabel($topping_name);
  }

  return $properties;

}
BurritoItem::isEmpty() - Tell Drupal when a value should be considered empty
After a user enters values into your custom field and hits submit, Drupal checks to see if the fields are empty. If they are empty, it doesn't try to validate or save anything. Hence, the sole purpose of this isEmpty() method is to help Drupal understand when a field item should be considered empty (and hence ignored). If this method returns FALSE, Drupal knows that the field has some value which needs to be validated and saved.
In the example below, I check if the user has entered anything in the text boxes or checked any of the checkboxes - if yes, then we treat the BurritoItem as non-empty by returning FALSE.
public function isEmpty() {

  $item = $this->getValue();

  $has_stuff = FALSE;

  // See if any of the topping checkboxes have been checked off.
  foreach (burrito_maker_get_toppings() as $topping_key => $topping_name) {
    if (isset($item[$topping_key]) && $item[$topping_key] == 1) {
      $has_stuff = TRUE;
      break;
    }
  }

  // Has the user entered a name for the Burrito?
  if (isset($item['name']) && !empty($item['name'])) {
    $has_stuff = TRUE;
  }

  return !$has_stuff;

}
Note: If you ever find that your values are not being saved to the database, there is high probability that this function is telling Drupal that the values are empty.
It's alive! My field is in the list!
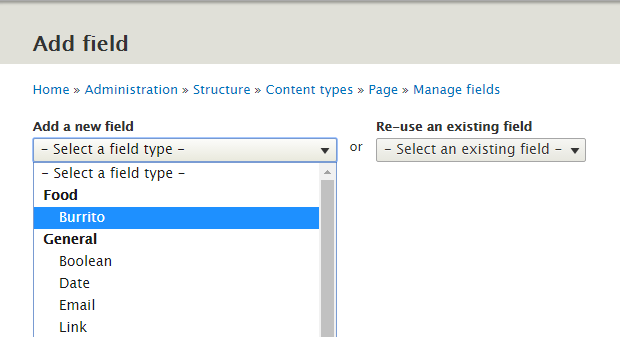
After you define the field type, you can enable the Burrito Maker module and you'll be able to see your field type on the Add field screen. You can try it out from Admin > Structure > Content types > Basic page > Manage fields for example.

Note: If you try to create a field instance at this moment, you'll probably receive an error message (even though your field instance might get created). This is because we have not defined the field widget and field formatters yet. Though we could have defined all the three classes first and then enabled the module, I personally like to see visible evidence of progress (like clients) when I code. Seeing my custom field in the list of field types gets me motivated me to write the rest of the classes.
Step 2: Define field widget with @FieldWidget annotation
So, the database tables are ready and your field type appears in the UI. But how would the user enter data for their custom burritos? Drupal doesn't know anything about them burritos! So, we need to implement a FieldWidget plugin to tell Drupal exactly how it should build forms for accepting burrito data.
Now, I add the default_widget definition in the FieldType annotation data - the machine name of our field widget being burrito_default. To define the structure of the widget, we create the following class with the @FieldWidget annotation:
/**
 * Contains field widget "burrito_default".
 *
 * @FieldWidget(
 *   id = "burrito_default",
 *   label = @Translation("Burrito default"),
 *   field_types = {
 *     "burrito_maker_burrito",
 *   }
 * )
 */
class BurritoDefaultWidget extends WidgetBase implements WidgetInterface {
  public function formElement(FieldItemListInterface $items, $delta, array $element, array &$form, FormStateInterface $form_state) {...}
}
The data we specify for the field widget is as follows:
- id: Unique identifier for the widget.
- label: Human-readable name.
- field_types: An array of field types (referenced by field type id) supported by the widget.
This class must implement the required method formElement(). However, in our example, we have two other utility methods as well.
BurritoDefaultWidget::formElement()
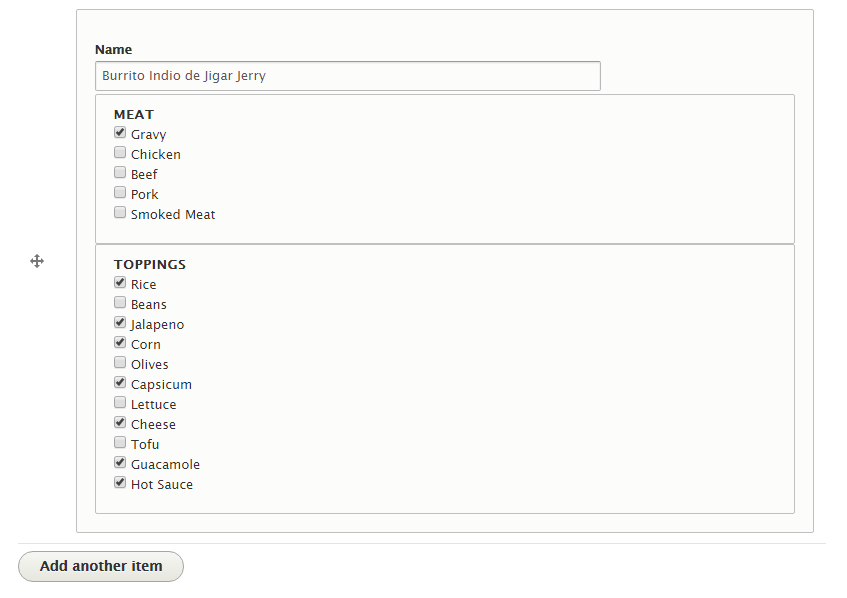
This method is pretty straight-forward and is responsible for defining form items which map to various schema columns provided by the field type. In our case, this method looks a bit complicated (though it is quite simple) because we have various checkboxes for the toppings/ingredients of the burrito, placed inside two fieldsets - Meat and Toppings - the meat fieldset being hidden if the field settings do not allow meat.
Here is a screenshot of the type of form we intend to build:

You'll notice that in the form above, we have the Add another item button. This is because the Number of values option in the field settings is set to Unlimited. You can add as many burrito definitions as you want, just like any other multi-value field. Below are some details about how the form elements are defined. For more background information about defining form elements, you can refer to Drupal's Form API.
First, I prepare the field item for which we are building the form element. $items contains all field items added to the entity - hence, it is a FieldItemListInterface. We are interested in the $delta index of the $items array - the field item for which we are building the form.
// $item is where the current saved values are stored.
$item =& $items[$delta];
Since our form widget has many fields, I thought it would be better to wrap it in a fieldset to make the fields appear grouped in the UI.
// In this example, $element is a fieldset, but it could be any element
// type (textfield, checkbox, etc.)
$element += array(
  '#type' => 'fieldset',
);
Inside this fieldset, we define a self-explanatory textfield where the user would type the Name of the burrito.
$element['name'] = array(
  '#title' => t('Name'),
  '#type' => 'textfield',
  // Use #default_value to pre-populate the element
  // with the current saved value.
  '#default_value' => isset($item->name) ? $item->name : '',
);
Now, we show a meat fieldset only if the field settings do not disallow meat.
// Show meat options only if allowed by field settings.
if ($this->getFieldSetting('allow_meat')) {

  // Have a separate fieldset for meat.
  $element['meat'] = array(
    '#title' => t('Meat'),
    '#type' => 'fieldset',
    '#process' => array(__CLASS__ . '::processToppingsFieldset'),
  );

  // Create a checkbox item for each meat on the menu.
  foreach (burrito_maker_get_toppings('meat') as $topping_key => $topping_name) {
    $element['meat'][$topping_key] = array(
      '#title' => t($topping_name),
      '#type' => 'checkbox',
      '#default_value' => isset($item->$topping_key) ? $item->$topping_key : '',
    );
  }

}
We iterate over all possible meat toppings in a foreach loop and define a checkbox for each ingredient. We do the same for regular vegetarian toppings as well - the only difference is we put the veggie toppings in a separate fieldset. Once done, we simply return the form element we built.
Note: You might notice a #process attribute defined in the toppings and meat fieldsets - we use the BurritoDefaultWidget::processToppingsFieldset() method to flatten the fieldset values to the format expected by the Field API. Also, you might notice the use of settings in the code - these settings will be described in the Plugin settings section in this article.
Step 3: Define field formatter with @FieldFormatter annotation
Now for presentation of the burrito data, we define the BurritoDefaultFormatter class. Its main purpose is to take a list of BurritoItem objects and display them as per the field's display settings. This is done by the only required method in the formatter plugin implementation, BurritoFormatter::viewElements(). After defining the formatter, I added the default_formatter declaration in the field type implementation.
/**
 * Contains field widget "burrito_default".
 *
 * @FieldFormatter(
 *   id = "burrito_default",
 *   label = @Translation("Burrito default"),
 *   field_types = {
 *     "burrito_maker_burrito",
 *   }
 * )
 */
class BurritoDefaultFormatter extends FormatterBase {
  public function viewElements(FieldItemListInterface $items, $langcode) {...}
}
Note the annotation @FieldFormatter which defines the following:
- id: Unique ID of the field formatter.
- label: Human readable name for the formatter.
- field_types: The field types supported by this formatter (referenced by field type id).
The viewElements() method receives a list of BurritoItem objects and prepares a huge render array containing render data for all of the field values.
Note: You might notice the use of settings in the code. These settings are described in the Plugin settings section of this article.
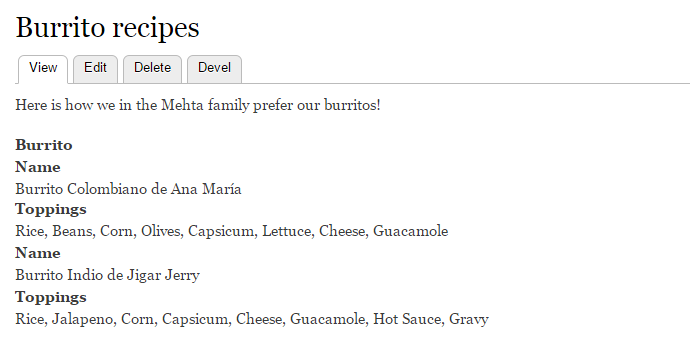
It's alive! I can view burrito data!

Plugin settings - Could it be any better?
More often than not, we have settings associated to various plugins. For example, the burrito formatter could provide the administrator an option to choose how the field items are displayed - whether as comma-separated values or as an unordered list. Here's how this setting would look in the UI:

Though it might sound difficult, it is actually very easy to do this in Drupal. All you have to define is the two methods defaultSettings() and settingsForm() to enable settings. The good news is that this works the same way for pretty much every plugin implementing the PluginSettingsInterface:
PluginClass::defaultSettings()
This method returns an associative array of all options provided by the plugin. Here is the BurritoDefaultFormatter::defaultSettings() method:
public static function defaultSettings() {
  return array(
    'toppings' => 'csv',
  ) + parent::defaultSettings();
}
Note: For the plugin settings to auto-save, a default value for every parameter must be declared.
PluginClass::settingsForm(array $form, FormStateInterface $form_state)
This method simply returns an array of form elements for accepting the settings from the UI. Here is the BurritoDefaultFormatter::settingsForm(array $form, FormStateInterface $form_state) method:
public function settingsForm(array $form, FormStateInterface $form_state) {

  $output['toppings'] = array(
    '#title' => t('Toppings'),
    '#type' => 'select',
    '#options' => array(
      'csv' => t('Comma separated values'),
      'list' => t('Unordered list'),
    ),
    '#default_value' => $this->getSetting('toppings'),
  );

  return $output;

}
PluginClass - Other settings related methods
Apart from the defaultSettings() and settingsForm() method, you can also use the getSettings(), getSetting(), setSettings() and setSetting() methods.
Next steps
Now that you have an idea of how to build a custom multi-part field, you can try this out on your next project. Here are some resources to help you out:
- Take a look at the burrito_maker repository on GitHub.
- Read more about the Drupal Form API.
- Read more about Drupal Form Elements and supported attributes.

