Using Auth0 to create a centralized login page for Drupal sites
Drupal’s basic user authentication system is ideal for small and isolated apps. But when users are signing into multiple interactive sites and apps, it makes sense to offer a centralized authentication system to save users from remembering multiple passwords.
These days, social sites have become de facto identity providers. Users expect websites to provide social login and single sign on functionality. In these scenarios, the built-in Drupal authentication system is very limited.
Introducing Auth0: authentication and authorization as a service
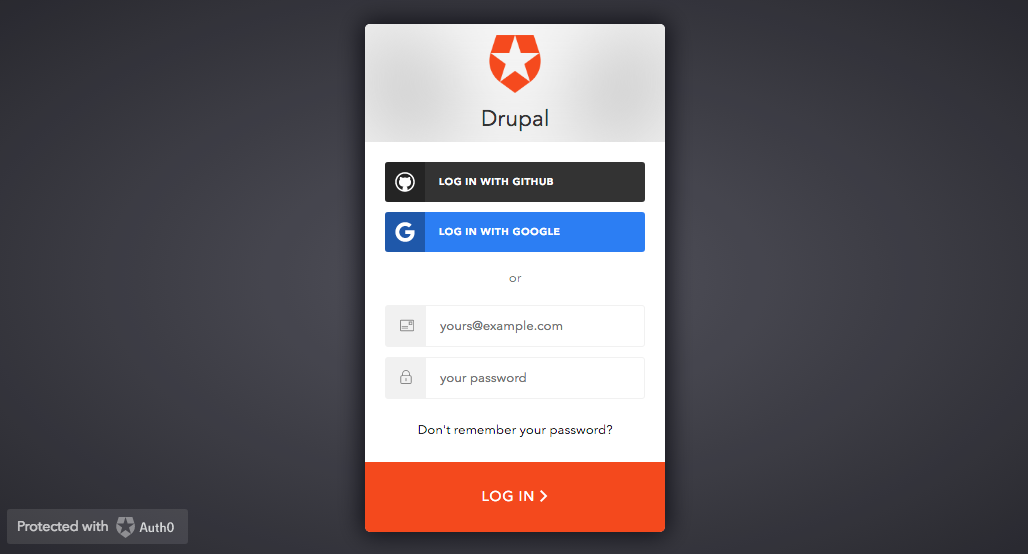
There are several ways of enabling single sign-on and social logins on Drupal websites. In this article, we’ll introduce Auth0 and explain how to use it to create a cool, centralized login page like the one shown below.

Auth0 provides authentication and authorization as a service. It includes various methods to authenticate, such as username/password, social accounts, SAML and OTP. It can also connect on-premise identity databases. The authentication mechanism is device-agnostic, so it works consistently across various devices.
Auth0 implements OAuth 2.0 — an open standard for authentication that can be used between applications and websites. It also implements other standards that can be used for authentication, including SAML and OpenID Connect.
Here are some of the ways you can integrate Auth0 with Drupal
-
As a single sign-on across multiple Drupal apps, where Auth0 acts as a central store for credentials
-
To allow users to log into Drupal using existing credentials from systems such as LDAP, Google Suite, or Office 365
-
To integrate social logins such as Google and Facebook
How to implement Auth0
In the steps below, you’ll learn how to set up Auth0 on a Drupal site for a typical use case. It will enable users to log into your Drupal site using their social media accounts. They'll also be able to create an account if they don't already have one.
There are two Auth0 modules you can choose from:
-
Auth0 module on GitHub: is the official module. It has more features but doesn't follow all of Drupal coding standards.
-
Auth0 module on Drupal.org is a fork of the official module on drupal.org. It follows coding standards, but lacks some functionality, as many changes have not been merged from the aforementioned GitHub repository.
When we integrated Auth0 on a client’s site a few months ago, we spent a good amount of time analyzing these two modules.
Only some basic features were required, all of which were available in the Drupal.org module. We therefore opted for cleaner code over the additional features.
In fact, both modules contained errors that we needed to fix. The generic patches that resulted from this process were submitted to both repositories. These patches were recently merged; there is some collaboration underway to sync changes between the two repositories. In the future, this will save users the extra step of choosing a module.
Create an Auth0 Application
Here is the basic configuration to get started with Auth0 for Drupal.
Note that it’s very important that the callback you use in this configuration is HTTPS. You should always use HTTPS in production (or even during development if sensitive user accounts are being used).
-
Create an Auth0 account and log into the Auth0 Dashboard.
-
Create a new application and select Type as "Regular Web Applications".
-
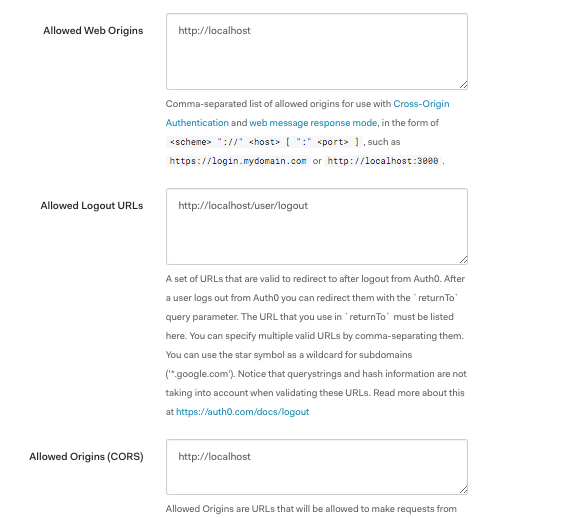
In the Settings tab, do the following:
-
Add
https://example.com/auth0/callbackto the Allowed callback URLs section. Make sure you replaceexample.comwith the domain name of your site. You can also add local URLs. -
Add
https://example.com/user/logoutto the allowed logout URLs section. -
Add
https://example.comto the Allowed Origins (CORS) section to allow the origins that will be able to make requests.
-

-
Proceed to the next step and select PHP for "What technology are you using for your web app?"
-
Go to Connections > Social and enable the social logins that you want to use (these links are located in left sidebar of the Auth0 Dashboard)
You are now done with the basic setup! Users can now create accounts, or log in using their credentials from the providers that you enabled in the previous step.
Optional Configuration
Additionally, Auth0 provides many features for building advanced authentication mechanisms, and it can determine how data is stored and passed to applications.
For example, Auth0 enables you to:
-
Use add-ons to generate access tokens for systems such as Salesforce, Azure Service Bus and SAP.
-
Configure social connections for authentication.
-
Implement username and password authentication to have an Auth0 DB or your own DB connected to store authentication information.
-
Use passwordless authentication to send a login link to email or OTPs to mobile.
-
Use multi-factor authentication.
-
Customize data shared with apps, but using simple JavaScript based rules.
Configure Auth0 in Drupal
Next, you'll need to configure Drupal to connect to the Auth0 Client we created:

-
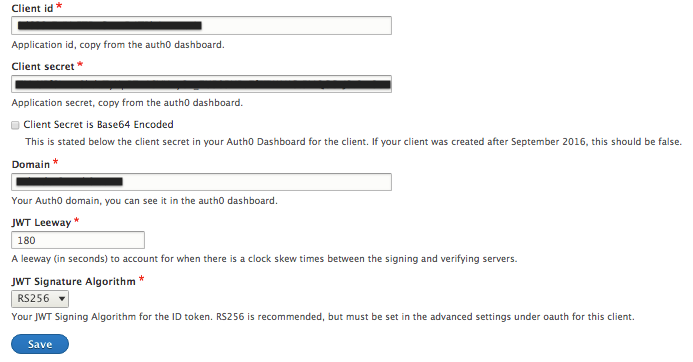
Go to the Auth0 configuration page (admin/config/auth0) in your Drupal site’s admin area.
-
Add the Auth0 Credentials Client ID, Domain and Client Secret. This information is in the Auth0 dashboard.
-
Make sure you select RS256 as the "JWT signature algorithm". This is the default algorithm configured in the Auth0 Client.
Advanced Setup
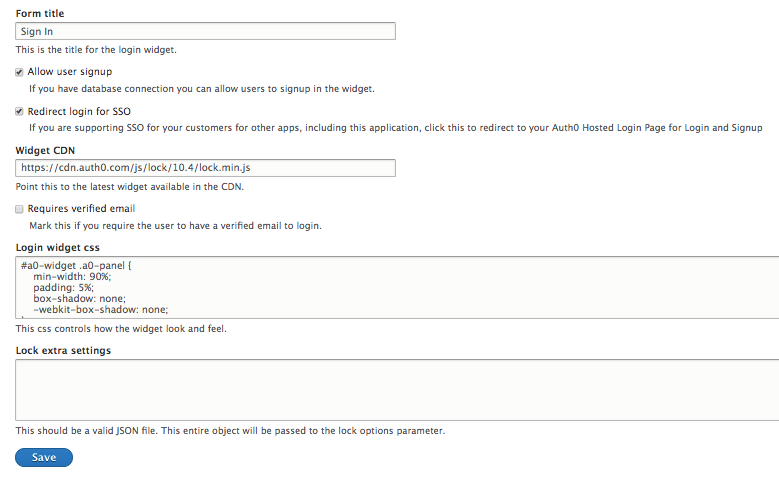
Depending on how you want users to log in, you can use the Auth0 hosted login page or embed a widget in the Drupal login page/block:
-
Select Redirect login for SSO to use an Auth0 hosted login page. We recommend this option because it’s more secure. It is ideal if you have multiple web applications using the same authentication information — users will be logged in automatically without having to provide their credentials each time. If you want more control over how the widget looks using the hosted login approach, you can customize the look in the "Hosted Pages" section in the Auth0 Dashboard.
-
Select Redirect login for SSO to embed a widget in the login page and block. This makes more sense for an isolated app.
Similarly you can select other options, such as: allowing users to signup via Auth0, or requiring users to verify their email addresses before they can log in.

Next Steps
Now that you have done the basic Auth0 setup, it’s time to learn more about what Auth0 can bring to your Drupal site and explore how you can extend Auth0 functionality:
-
Read the Auth0 official documentation pages.
- Extend the Auth0 module’s functionality by subscribing to various events, such as Auth0UserSigninEvent and Auth0UserSignupEvent.
We’d love to hear about new ways you’ve found to implement Auth0 to streamline authentication. Leave us a comment to share your questions, experiences and use cases.

